I'm back....
I am feeling healthier and stronger lately.. and I miss blogging!!!
I am going back to work in a month after 3 years of being a SAHM. Feeling very nervous about it!
I have been cooking A LOT of new recipes. No pictures :/ but I will blog about my experiences with them. I have a few AMAZING recipes to share with you and some that really flopped. Maybe I did something horribly wrong? If you can figure out what I did so wrong let me know!!
I am excited to be back :)
HELLO EVERYONE!!

September 7, 2012

March 6, 2012
Apples for March.
I cried in a super market yesterday. In the produce aisle of my Loblaws. I never thought apples could make me cry. But there I was, apple in hand, tearing up. I continued to tear as I put the apples into the little bag and into my cart. The tears kept coming as I was scanning for best prices for bread. I wasn't crying or sobbing.. just.. tearing.. My nine year old asked me why I was crying.....
"Because of the Sonya apples.. "
I didn't even know there was such a thing as Sonya apples.. How fitting to find them in March.. The month of her birth.. The month of her gentle passing...
Sonya apples, as I have come to find out, our juicy and sweet and very yummy! I do believe Sonya herself would have enjoyed them. I can't help but wonder if she knew of apples named Sonya.. I am sure she would have gotten a kick out of them.
I miss you dearly... I am so thankful for Sonya apples...

"Because of the Sonya apples.. "
I didn't even know there was such a thing as Sonya apples.. How fitting to find them in March.. The month of her birth.. The month of her gentle passing...
Sonya apples, as I have come to find out, our juicy and sweet and very yummy! I do believe Sonya herself would have enjoyed them. I can't help but wonder if she knew of apples named Sonya.. I am sure she would have gotten a kick out of them.
I miss you dearly... I am so thankful for Sonya apples...

February 8, 2012
Cookies in a Jar - Chocolate Chip M&M
One of my Favourite things to bake are cookies!! I can't get enough.
Getting to make yummy cookies and being able to share them to friends and family as gifts is a HUGE plus! But how do you accomplish this and make sure the cookies stay fresh? By making Cookies in a jar of course :)
I made a few batches before I perfected it!
Recipe to put into the jars.
In a large Bowl Mix together:
2 1/4 cups of Flour
1/2 Sugar
1 tsp Salt
1 tsp baking soda
Mix well and add to the bottom of your jar.
Add 1/3 cups of Chocolate chips.
Then add 1/3 of M&M's of any colour you want. You can make Christmas looking ones with Red and Green M&M or Valentines one with Red and White M&M's.
Next add a layer of 1/2 cup of ( packed) Brown sugar.
The next step is the fun part! You get to create a tag for your Jar. You can do almost anything. You could paint on some home made Chalkboard paint and then write on the directions right on the jar. I went with a Tag. I added on bows but you can
The directions should be as follows.
Preheat over to 350 degrees.
Add the contents of the jar to a large bowl.
Mix in 2 eggs, 1 cup of butter and 2 tsps of Vanilla.
Mix till blended. Place 1 inch balls on an ungreased cookie sheet.
Bake for 8 - 10 mins or until the edge start to get golden.
Let them cool then ENJOY!
I had a great time with my 8 year old creating this recipe and eating the batches! It is a super cute gift and so simple to make! I add on bows but you can decorate it anyway you want. Get the kids involved especially if it is a gift for grandparents!

Getting to make yummy cookies and being able to share them to friends and family as gifts is a HUGE plus! But how do you accomplish this and make sure the cookies stay fresh? By making Cookies in a jar of course :)
I made a few batches before I perfected it!
Recipe to put into the jars.
In a large Bowl Mix together:
2 1/4 cups of Flour
1/2 Sugar
1 tsp Salt
1 tsp baking soda
Mix well and add to the bottom of your jar.
Add 1/3 cups of Chocolate chips.
Then add 1/3 of M&M's of any colour you want. You can make Christmas looking ones with Red and Green M&M or Valentines one with Red and White M&M's.
Next add a layer of 1/2 cup of ( packed) Brown sugar.
The next step is the fun part! You get to create a tag for your Jar. You can do almost anything. You could paint on some home made Chalkboard paint and then write on the directions right on the jar. I went with a Tag. I added on bows but you can
The directions should be as follows.
Preheat over to 350 degrees.
Add the contents of the jar to a large bowl.
Mix in 2 eggs, 1 cup of butter and 2 tsps of Vanilla.
Mix till blended. Place 1 inch balls on an ungreased cookie sheet.
Bake for 8 - 10 mins or until the edge start to get golden.
Let them cool then ENJOY!
I had a great time with my 8 year old creating this recipe and eating the batches! It is a super cute gift and so simple to make! I add on bows but you can decorate it anyway you want. Get the kids involved especially if it is a gift for grandparents!

January 19, 2012
A very whippety ending!
I had to share this!
I currently lease a VW and will be leasing a new this year when the lease runs out.. I <3 VW.
This commercial tickled me like you would NOT believe! Enjoy!
HOW CUTE IS THAT!! hehe..
Oh I do so <3 Whippeties!!!!
I currently lease a VW and will be leasing a new this year when the lease runs out.. I <3 VW.
This commercial tickled me like you would NOT believe! Enjoy!
HOW CUTE IS THAT!! hehe..
Oh I do so <3 Whippeties!!!!
January 18, 2012
Pay-it-Forward 2012
I am very excited about 5 crafts I will be doing this year! Why? you ask... Because it is part of a pay-it-forward I decided to take part in on FaceBook :)
I have 5 lovely people I will be sending special hand made pressies for! I have ideas galore!!! I have till the end of 2012 to get them out. My goal is to send one out ever 2 -3 months or so. I will be trying to send them out in the order I got the request on my facebook!
Are you doing a pay-it-forward? Have you ever? How did it turn out? Let me know!
Stay posted for the pay-it-forward crafts!
I have 5 lovely people I will be sending special hand made pressies for! I have ideas galore!!! I have till the end of 2012 to get them out. My goal is to send one out ever 2 -3 months or so. I will be trying to send them out in the order I got the request on my facebook!
Are you doing a pay-it-forward? Have you ever? How did it turn out? Let me know!
Stay posted for the pay-it-forward crafts!
December 31, 2011
Happy New Years Eve!!! Goodbye 2011!!
Found this and decided to post it for everyone one!
I <3 Zooey!!!!
I <3 Zooey!!!!
Happy New Years Eve!!!
December 29, 2011
Retro Atari Cake ! So amazing!
I was searching for some ideas online this morning and came across this gem. I couldn't find the original post for this, but here is what I found...


How cool is this! Brings me back for sure! Whoever it is that made this, I salut you! And thank you for this amazing cake!
New technologies are coming at us at speeds we can hardly handle.. It is great to see the "oldies" being commemorated :P
December 21, 2011
Making your own Finger Print Christmas Tree Ornament

I love making gifts for family that means something. Grandparents LOVE things that have a special meaning and has something to do with their grandchildren. This is why I choose this for my Mother-in-law. She will for sure display this in her tree proudly!
What you will need:
Clear ornament bulb
Acrylic craft paint
clear coat spray
Paint brushes
Ribbon of your choice
A Child's lovely Hand for their fingerprint!

I started with a clear ornament and took the metal top off. I then poured inside the bulb turquoise and white paint and slowly moved the bulb around till the whole inside was covered in paint. You can use any colour combination or even just one colour. I went in and used a brush to get areas that weren't doing the affect I was looking for.

Next I painted on a Stocking. Here is how I started it with the white outline. I added dots later on. You could do any kind of a design on this side. Grandma always makes a special stocking for her grandchildren so I thought this would be cute.

I then grabbed my eldest child and painted her three fingers to make the body of the snowmen on the other side of the ornament. Make sure to test out your technique before doing it on the ornament! We did 2 takes before doing the finger prints on the actual gift. I then painted on snow under the fingerprints, added eyes, mouth, nose, hat and arms. Make sure after the paint is dry to spray the whole ornament with a clear cote to make sure the paint doesn't rub off.

I then made a bow out of ribbon and slipped it threw the hole of the metal topper and replaced the topper on the ornament.
I should have taken more pics of each step but I was making this late at night and kept forgetting to take pictures lol.
This is how it turned out. You can piece it easily together how I finished up each steps. Be creative and have fun with it :)


December 14, 2011
How to make Marshmallow Fondant !
I remember the first time I thought of making my own fondant I was worried I wouldn't be able to get it right. The best part about marshmallow fondant is how EASY it is to make and use! Just remember the more you make it the easier it will get and the more you will perfect it.
What you will need:

Spatula
Microwave safe bowl
Dish cloth (optional if you use a cutting board)
Cutting board ( optional )
1 bag of Mini-marshmallows
1 kg bag of Icing Sugar
Vegetable Shortening
Icing colours ( whatever colour/s you want )
1 to 5 Tbsp of Water
Vanilla extract ( Optional )
This will make about 2 lbs of fondant.
You can either spread vegetable shortening directly on your counters and make the fondant there or you can spread it on a cutting board. I find it is an easier clean up on a cutting board ( especially if you are making a few colours ).
 If you use a cutting board make sure to dampen cloth to put under it to keep the board from moving around when you are kneading the fondant.

Make sure to well grease your microwave safe bowl and your spatula with vegetable shortening. Add the full bag of marshmallows into the bowl and about 1 to 2 Tbsp of water. Put in the microwave for 30 second intervals checking it till the marshmallows start to swell up.

This is when you want to add your colouring. Some sites tell you to add it after you have already knead the marshmallows and icing sugar but I find that you don't get a consistent colour and it is A LOT more work. Keep in mind that your end colour will be slightly lighter once you add the icing sugar with your marshmallows.

Once you get the colour you want, pour it into the "mouth" of your icing sugar volcano. Add another 1/3 of the icing sugar on top of the marshmallows to make a sandwich of icing sugar, marshmallow, icing sugar.


Remove any rings from your fingers and grease your hands up well with the vegetable shortening. Start mixing the icing sugar and marshmallow together. If it starts to stick to your hands add more shortening to your hands. Try to only touch the icing sugar parts instead of the marshmallow. Keep kneading it all together till the icing sugar is mixed in. If it is still very sticky add very little amounts of icing sugar till it gets to the point where it is still somewhat sticky but no longer sticking to your hands.

Marshmallow fondant will always be sticky. If you get all the "sticky" feel out it will start to fall apart on you. If this starts to happen you will have to add more marshmallow to it. Once you make marshmallow fondant a few times you will get the hang of when to stop adding icing sugar. I have tried to follow all marshmallow fondant recipes found online and I always find that depending on which brand of ingredients I am using I need more or less icing sugar. Take your time adding the rest of your icing sugar and if you don't' use it all that is ok!
You can store it by rolling it into a ball, lightly greasing it with vegetable oil and wrapping it cling wrap. I will usually wrap it with cling wrap AND put it in a zip lock bag. Keep in the fridge till you are ready to use it. Should be used within a month of making. It can be frozen up to 4 months.

Take it out of the fridge a few hours before you need to use it. Make sure your workspace environment is cool. If your home is too warm it will make the fondant harder to handle. If your fondant is sticky, as it should be, make sure to use a small amount of sifted icing sugar on your counters.
Then, create and have fun! :)
What you will need:

Spatula
Microwave safe bowl
Dish cloth (optional if you use a cutting board)
Cutting board ( optional )
1 bag of Mini-marshmallows
1 kg bag of Icing Sugar
Vegetable Shortening
Icing colours ( whatever colour/s you want )
1 to 5 Tbsp of Water
Vanilla extract ( Optional )
This will make about 2 lbs of fondant.
You can either spread vegetable shortening directly on your counters and make the fondant there or you can spread it on a cutting board. I find it is an easier clean up on a cutting board ( especially if you are making a few colours ).

Make sure to well grease your microwave safe bowl and your spatula with vegetable shortening. Add the full bag of marshmallows into the bowl and about 1 to 2 Tbsp of water. Put in the microwave for 30 second intervals checking it till the marshmallows start to swell up.

This is when you want to add your colouring. Some sites tell you to add it after you have already knead the marshmallows and icing sugar but I find that you don't get a consistent colour and it is A LOT more work. Keep in mind that your end colour will be slightly lighter once you add the icing sugar with your marshmallows.

Once you get the colour you want, pour it into the "mouth" of your icing sugar volcano. Add another 1/3 of the icing sugar on top of the marshmallows to make a sandwich of icing sugar, marshmallow, icing sugar.


Remove any rings from your fingers and grease your hands up well with the vegetable shortening. Start mixing the icing sugar and marshmallow together. If it starts to stick to your hands add more shortening to your hands. Try to only touch the icing sugar parts instead of the marshmallow. Keep kneading it all together till the icing sugar is mixed in. If it is still very sticky add very little amounts of icing sugar till it gets to the point where it is still somewhat sticky but no longer sticking to your hands.

Marshmallow fondant will always be sticky. If you get all the "sticky" feel out it will start to fall apart on you. If this starts to happen you will have to add more marshmallow to it. Once you make marshmallow fondant a few times you will get the hang of when to stop adding icing sugar. I have tried to follow all marshmallow fondant recipes found online and I always find that depending on which brand of ingredients I am using I need more or less icing sugar. Take your time adding the rest of your icing sugar and if you don't' use it all that is ok!
You can store it by rolling it into a ball, lightly greasing it with vegetable oil and wrapping it cling wrap. I will usually wrap it with cling wrap AND put it in a zip lock bag. Keep in the fridge till you are ready to use it. Should be used within a month of making. It can be frozen up to 4 months.

Take it out of the fridge a few hours before you need to use it. Make sure your workspace environment is cool. If your home is too warm it will make the fondant harder to handle. If your fondant is sticky, as it should be, make sure to use a small amount of sifted icing sugar on your counters.
Then, create and have fun! :)
December 13, 2011
Baking up a storm!!!

Well, more of a few flurries.
I was thinking this would take me a while to create a good M&M / chocolate chip cookie recipe seeing as I have never made one. I adapted a recipe from about 5 recipes. First batch came out looking good.. and within 5 mins of them being ready to eat they were almost all gone. I think it is a keeper recipe!
This is part of my experiment for a jar cookie recipe for Christmas gifts. I thought my daughter and I would be baking a bunch of failed cookies before we got to one we like!
This is kinda a good/bad thing.. Great because now I can clean up and enjoy a relaxing evening. Bad, because it means less cookies :P
Happy Baking everyone! Come back soon to see the finished result of the cookie in a jar and the recipe!
December 12, 2011
Who says Geeks and Baking can't mix?

You have to love a guy who bakes AND can get his geek on :P He will one day be an awesome husband to a lucky geeky girl lol..
December 11, 2011
Oven Baked BACON! Yum!
My family LOVES bacon.
I HATE cooking bacon. There IS an easier solution to this love/hate affair. This is GREAT for Christmas morning when you are busy and don't want to be standing over a stove.
BAKE IT!
Preheat your oven to 400F.

Line a cookie sheet that has a small lip to it to ensure no grease spills with Tin foil. Place your Bacon on the sheet making sure they do not touch.

Bake it on the middle rack from anywhere from 8 mins to 12 mins depending on how crispy you like your bacon.
It should easily peal off.
Then, ENJOY!

It doesn't get much easier then that. The only clean up is waiting till the cookie sheet is cool enough to throw away the tin foil.
I HATE cooking bacon. There IS an easier solution to this love/hate affair. This is GREAT for Christmas morning when you are busy and don't want to be standing over a stove.
BAKE IT!
Preheat your oven to 400F.

Line a cookie sheet that has a small lip to it to ensure no grease spills with Tin foil. Place your Bacon on the sheet making sure they do not touch.

Bake it on the middle rack from anywhere from 8 mins to 12 mins depending on how crispy you like your bacon.
It should easily peal off.
Then, ENJOY!
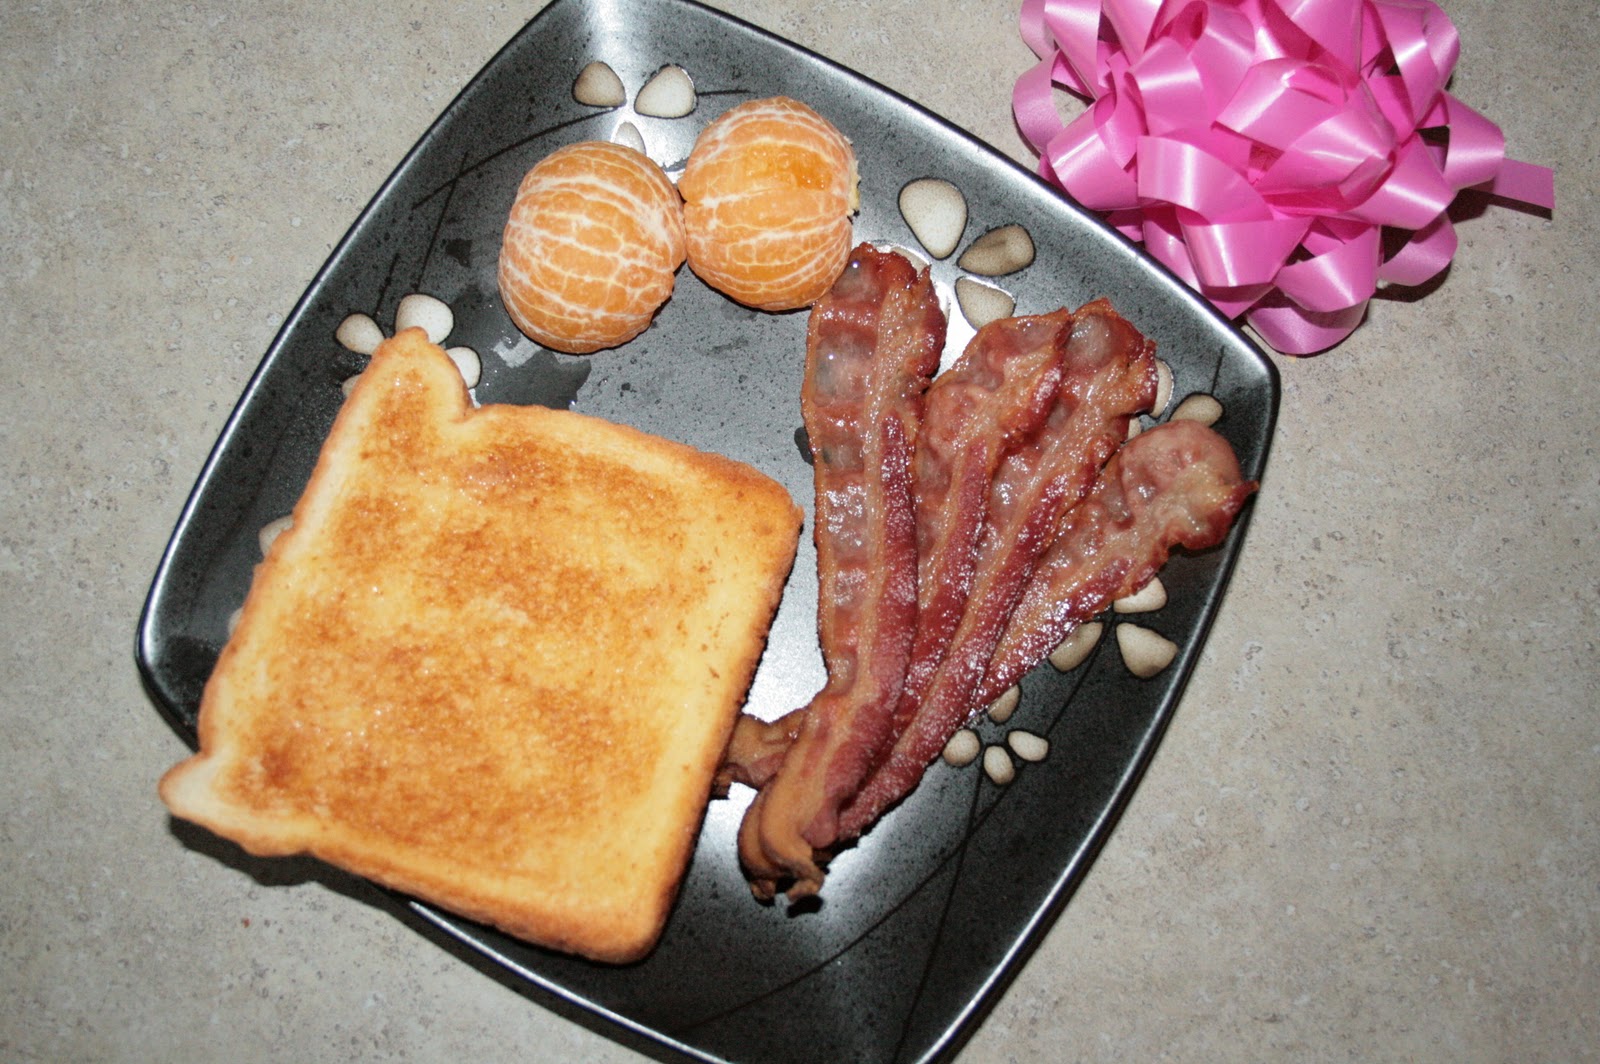
It doesn't get much easier then that. The only clean up is waiting till the cookie sheet is cool enough to throw away the tin foil.
December 10, 2011
Christmas Tree Hair Clip - Easy Tutorial

What you will need

Two or more different coloured Ribbon.
Scissors
Hair clip
Glue Gun
No slip piece ( optional )
and something cut to put at the top! either more ribbon, a bell, jewel... anything.
First cover your Hair clip with 13cm of ribbon like this using your glue gun.

Hot glue on the inside top of the hair clip the no slip piece.
Next you will want to cut up 6 strips of ribbon. Two at 9cm, two at 7cm and two more at 5.5cm.
Next you will want to cut up 6 strips of ribbon. Two at 9cm, two at 7cm and two more at 5.5cm.
Using your glue gun again, attached to the alligator clip like this.

Next add whatever type of Christmas Tree topper you would like. I chose a bell for this one with a small white ribbon.

And voila! A creative easy Christmas Tree Clip to put in little girls or even your own hair!
You can do them to match any dress or outfit! Have fun!

December 9, 2011
Pregnancy baby shower Cake
I am in the middle of some crafts currently..( Keep an eye out for those!!! ) I didn't want to leave the blog go for a few days.....
soooo .. I have decided to show you one of my first and one of my favourite fondant cakes that I have made.
It was for my lovely best friends baby shower !! I was so excited to make her a pregnant cake !!


soooo .. I have decided to show you one of my first and one of my favourite fondant cakes that I have made.
It was for my lovely best friends baby shower !! I was so excited to make her a pregnant cake !!

My first rose out of gum paste

So what do you guys think?
I so hope I can make one of these again! Probably one of the more interesting cakes to make!
All you need is two from the mini-wonder mold pan

Shape them into "boobs".
and one from the Soccer mold pan.

You place two from the mini-wonder cakes formed into breasts above the soccer cake and then drape Fondant over it all. Mold the fondant around it and drape some at the bottom to make the rest of the shirt/dress.

Then decorate as you wish!
The next time around I will find a chocolate foot mold and put a chocolate foot under the fondant on the belly to make a "baby foot" show up !! would be so cute!

December 5, 2011
Elmo fondant cake for a sweet 2 year old
This past week/end I was pretty busy. I was baking and creating! My lovely youngest daughter turned 2! How bitter sweet. I will post the recipes for the actual cakes later this week. Today I am going to show you what I created for my Elmo loving girl.

Voila Elmo!
The top cake is a buttermilk vanilla cake.. Bottom is a buttermilk chocolate cake. 4 cakes in all.. Dense cakes!!! Must have weighed a good 30lbs!


Voila Elmo!
The top cake is a buttermilk vanilla cake.. Bottom is a buttermilk chocolate cake. 4 cakes in all.. Dense cakes!!! Must have weighed a good 30lbs!

The cake was well enjoyed by her :) Happy 2nd Birthday Baby Girl!!! <3
November 30, 2011
Felt Christmas Stockings

I love crafting! Mix crafting and Christmas and I am one happy gurl!! I loved this project. I did a mock decorating to show how beautiful these are. I couldn't wait till next weekend when we will be decorating the house.
Simple is great! This is a no sew project.
What you will need:
Felt in the colour of your choice
Scissors
Hot glue gun
Pencil
Template paper. I use construction paper
Decorations (Ribbons, stickers, Bells anything you want to use)
Using your Pencil draw out a simple stocking outline on your construction paper. Cut it out. Place your template on the felt of your colour choice. Draw the outline of your template on your felt and then cut out. Hot glue the sides together but not the top. You COULD sew it if you want but the hot glue binds felt really well. Cut out a small piece of felt in a rectangle shape to make a hook loop. Hot glue your hook loop to the inside of your stocking. Err.. yes that is a whippet toy in this pic lol.


I had to do a pink one!! Love it!!!

November 27, 2011
Amazing Chocolate Chip Mug Cake

I have tried MANY mug cakes and they all tasted horrible.
I have been experimenting with a few different ways of making them. I was determined to find an easy late night snack for my chocoholic needs. Alas! I have found it!!! I had found a recipe online that was good but couldn't find it again and was very upset. I remembered some key parts ( no egg and no baking soda/powder) and tested out a few recipes tonight. I made about 5 different ones. I have found a keeper for myself!
Decided I would be nice and share with you guys :)
Enjoy!
1 Mug
2.5 Tbsp of Flour ( so many of the other recipe's call for way too much flower!)
3 Tbsp Sugar
3 Tbsp Milk
2 Tbsp Oil ( I used vegetable )
3 Tbsp Cocoa Powder
1 Tbsp Vanilla
1/4 cup Semi-Sweet chocolate chips ( this is key! )
and a bit more Chocolate chips for the topping!

Put it in the microwave for around 2 mins. After the 2 mins mark, take it out and add a bit of chocolate chips to the top. Put it back in the microwave for another 30 or so seconds.
Use a butter knife to check to make sure the cake is fully cooked all the way to the bottom. The key to mug cake is DON'T OVER MICROWAVE! If you have a very powerful microwave you may need to adjust the time and put it in for less. Might take a try or two to get it right. If it tastes at all rubbery, it was left in there too long.
I bake A LOT of cakes. This one tasted almost authentic to a rich chocolate cake!
Many recipes call for egg. You would use about 2 tbsp of egg in this recipe but you really don't need it. Most recipes for mug cake online call for a full egg. This is way TOO MUCH! You will also find a lot of recipes that have baking soda and or Baking powder to make it rise. I find all this does it give it a baking soda/powder taste. When I come up with a recipe that tastes this good and that rises, I will post it and share it with you! :)
Shepherds Pie the Canadian Style!
Sunday is a great day for Shepherds Pie!

I had never realized it was such a Canadian food till recently. It is slowly making it's way down into the states. Let me know if you know of this dish and how YOU make it :)
This is how I was taught. Simple and yummy!
Depending on your oven safe dish, you will need about...
500g of ground beef (ground pork also works)
1 small onion
6 mushrooms
6-7 medium sized potatoes
1 can of corn
1 can of cream corn.
Garlic powder
Garlic Salt
1) Put a pot of water on to boil for your potatoes in and heat up a skillet on medium heat.
2) Pre-heat your oven to 375F.

3) Start cutting up your potatoes into small chunks.
5) Cut up the rest of your potatoes and start on your onion and mushrooms.
6) Add your potatoes to the water.
7) Remove any grease from your ground beef and add in your onions and mushrooms. Bring your heat to simmer. Add some garlic powder and garlic salt to taste.
8) Mix together in a bowl your cream corn and corn.

9) Put the ground beef mixture at the bottom of your oven safe dish.

10) On top of the ground beef put your mixed cream corn and corn.

11) When your potatoes are soft mash them with a bit of milk and butter.
12) Put the now mashed potatoes on top of the corn. I always put it in the oven for about 20 seconds then remove it again and spread some butter or margarine on top of the butter to help it get a nice golden colour at the end.

Leave it in the over for about 30 mins or until the top is nice and golden. Remove and let stand for about 5 mins. Then enjoy!!!
Subscribe to:
Posts (Atom)