November 30, 2011

Felt Christmas Stockings


I love crafting!  Mix crafting and Christmas and I am one happy gurl!!  I loved this project.  I did a mock decorating to show how beautiful these are. I couldn't wait till next weekend when we will be decorating the house.

Simple is great!  This is a no sew project.

What you will need:
Felt in the colour of your choice
Scissors
Hot glue gun
Pencil
Template paper. I use construction paper
Decorations (Ribbons, stickers, Bells anything you want to use)

Using your Pencil draw out a simple stocking outline on your construction paper.  Cut it out.  Place your template on the felt of your colour choice.  Draw the outline of your template on your felt and then cut out.  Hot glue the sides together but not the top.  You COULD sew it if you want but the hot glue binds felt really well. Cut out a small piece of felt in a rectangle shape to make a hook loop.  Hot glue your hook loop to the inside of your stocking.  Err.. yes that is a whippet toy in this pic lol.

Then let loose and decorate!  I love the traditional looks personally, but you could easily go wild with these stockings and do anything including funky animal prints!  This is also a great kids craft.  Just make sure you use the hot glue gun.  You can let them add decorations to the stocking using simple white crafting glue.  It will hold well enough.

I had to do a pink one!! Love it!!!


November 27, 2011

Amazing Chocolate Chip Mug Cake


I have tried MANY mug cakes and they all tasted horrible.
I have been experimenting with a few different ways of making them.  I was determined to find an easy late night snack for my chocoholic needs. Alas! I have found it!!! I had found a recipe online that was good but couldn't find it again and was very upset.  I remembered some key parts ( no egg and no baking soda/powder) and tested out a few recipes tonight.  I made about 5 different ones.  I have found a keeper for myself!

Decided I would be nice and share with you guys :)

Enjoy!

1 Mug
2.5 Tbsp of Flour ( so many of the other recipe's call for way too much flower!)
3 Tbsp Sugar
3 Tbsp Milk
2 Tbsp Oil ( I used vegetable )
3 Tbsp Cocoa Powder
1 Tbsp Vanilla
1/4 cup Semi-Sweet chocolate chips ( this is key! )
and a bit more Chocolate chips for the topping!

Mix everything together very well.  I find a butter knife works best.  Make sure to scrape the bottom of the mug!

Put it in the microwave for around 2 mins.  After the 2 mins mark, take it out and add a bit of chocolate chips to the top.  Put it back in the microwave for another 30 or so seconds.

Use a butter knife to check to make sure the cake is fully cooked all the way to the bottom.  The key to mug cake is DON'T OVER MICROWAVE!  If you have a very powerful microwave you may need to adjust the time and put it in for less.  Might take a try or two to get it right.  If it tastes at all rubbery, it was left in there too long.

I bake A LOT of cakes.  This one tasted almost authentic to a rich chocolate cake!

Many recipes call for egg.  You would use about 2 tbsp of egg in this recipe but you really don't need it.  Most recipes for mug cake online call for a full egg.  This is way TOO MUCH! You will also find a lot of recipes that have baking soda and or Baking powder to make it rise.  I find all this does it give it a baking soda/powder taste.  When I come up with a recipe that tastes this good and that rises, I will post it and share it with you! :)


Shepherds Pie the Canadian Style!

Sunday is a great day for Shepherds Pie!


I had never realized it was such a Canadian food till recently.  It is slowly making it's way down into the states.  Let me know if you know of this dish and how YOU make it :)

This is how I was taught.  Simple and yummy!

Depending on your oven safe dish, you will need about...

500g of ground beef (ground pork also works)
1 small onion
6 mushrooms
6-7 medium sized potatoes
1 can of corn
1 can of cream corn.
Garlic powder
Garlic Salt

1) Put a pot of water on to boil for your potatoes in and heat up a skillet on medium heat.
2) Pre-heat your oven to 375F.


3) Start cutting up your potatoes into small chunks.
4) Once your skillet is hot, add your ground beef and start to brown it.
5) Cut up the rest of your potatoes and start on your onion and mushrooms.
6) Add your potatoes to the water.
7) Remove any grease from your ground beef and add in your onions and mushrooms.  Bring your heat to simmer. Add some garlic powder and garlic salt to taste.
8) Mix together in a bowl your cream corn and corn.


9) Put the ground beef mixture at the bottom of your oven safe dish.


10) On top of the ground beef put your mixed cream corn and corn.


11) When your potatoes are soft mash them with a bit of milk and butter.
12) Put the now mashed potatoes on top of the corn.  I always put it in the oven for about 20 seconds then remove it again and spread some butter or margarine on top of the butter to help it get a nice golden colour at the end.


Leave it in the over for  about 30 mins or until the top is nice and golden.  Remove and let stand for about 5 mins.  Then enjoy!!!


November 26, 2011

20 gift ideas list to get any toddler


Know a toddler but have no idea what to get them?

Grandma called up the other day FREAKING out at the walmart.  " There are a zillion toys !! what do I get her for her birthday!!"

If you are melting down at a walmart, or any toy area, here is a simple list of ideas. At the end of this list I have the list repeated with picture ideas that corresponds to this list.  Visuals make life easy!

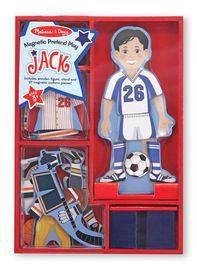
1)  Melissa and Doug magnetic dolls.  They have them for boys and girls! Even a santa one for christmas!

2) Elmo.  I don't know a toddler that can't resist elmo!

3)  Craft supplies!  Kids love being creative.  If you are purchasing markers or crayons, make sure they are WASHABLE!  You will be doing the parents a huge favour!

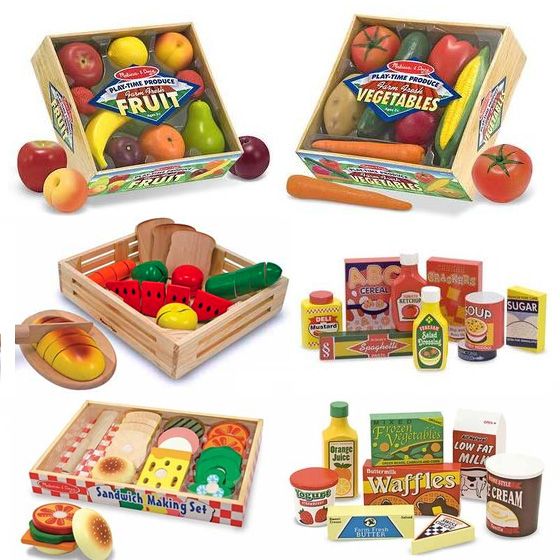
4) Play food.  Melissa and Doug have a great variety of play food.  Both boys and girls enjoy pretending they are master chefs!

5) Balls.  Yes, Balls.. simple enough right?  But toddlers love things that react when they interact with them.  Hence why a ball is a great gift.  No, we as adults don't think so but we are not buying for adults!  They have balls with pictures of all kinds of beloved characters on them also.  Score!

6) Books.  Make sure they are hard pages.  Toddlers love the sound of ripping so avoid paper pages.  ( Also ensure no paper cuts)

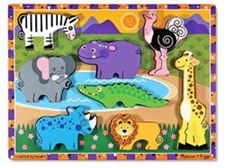
7) Puzzles.  Melissa and Doug have amazing puzzles and a huge variety.  Make sure to get wooden puzzles.  Toddlers aren't ready yet for the other puzzles.

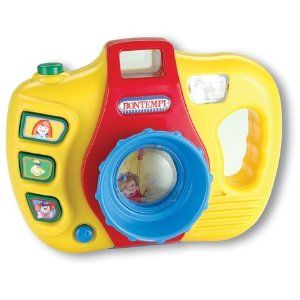
8) Toy camera.  CHEESE! This gift will be a hit with any toddler.  Parents and loved ones are always taking pictures of them but they can't touch the expensive camera's.  Every toddler loves pretending they are a grown up and taking pictures like one!

9) Trains.  This is a great toy for both girls and boys.  Thomas the train is no exception to this.  He is pretty expensive though.  I do tend to go back to Melissa and Doug but they have a cute train that also works on their coordination and imagination.  No, I do not endorse Melissa and Doug ( gosh but maybe I should? ) but they have such great toys for toddlers!

10) Bath toys.  Toddlers like new things.  This includes at bath time.  They spend a good amount of time in the bath after a busy day of getting down and dirty with play.  Giving them new options for bathtime might seem like a lame idea but the toddler wont think so!

11) Musical instruments.  There are many toddler versions of musical instruments and toys.  Toddlers are learning how to blow and tap to play out music.  Many smiles will be had from the simple joy of brining music into their lives.

12) Clean up toys.  Play vacuum cleaners, play mops and brooms.  This is the one time in a childs life they will WANT to  clean up... Or their version of it.

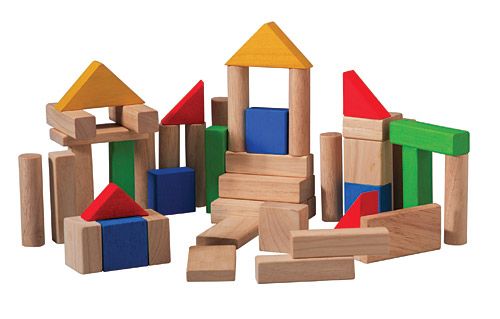
13) Blocks.  Again, basics are great!  There are reasons these toys have stood the test of time.  Kids play with them.  You can get simple wooden blocks with numbers and letters on them or the more fancy interlocking blocks like mega blocks with bright colours.

14) Musical CD or DVD.  Kids love to be moving and dancing.  They may not understand when they first open up this gift what it is but it wont take them long to love it!

15) Magnetic fridge toys.  Every toddler loves playing where mom/dad is working.  Giving them a safe place to do so in the kitchen is great toy for both the toddler and the parent!

16) Play Computers.  Computers are a huge staple of most homes now.  Toddlers love the real thing but it is too kisky to let them sit at mom or dad's computer when they are busy.  A play one is the perfect solution.
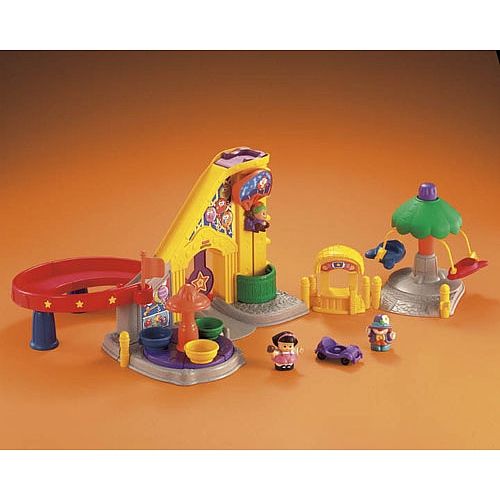
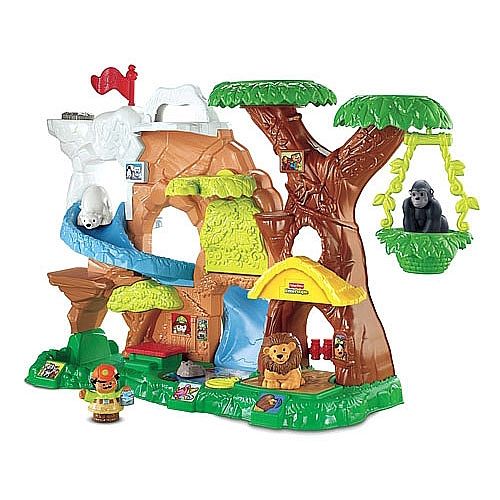
17) Little People by Fisher Price. There are a variety of toys and sets.  Toddlers love them.  Any one of the sets makes a great toddler gift.  This is great if you really are unsure and want something more traditional to give.

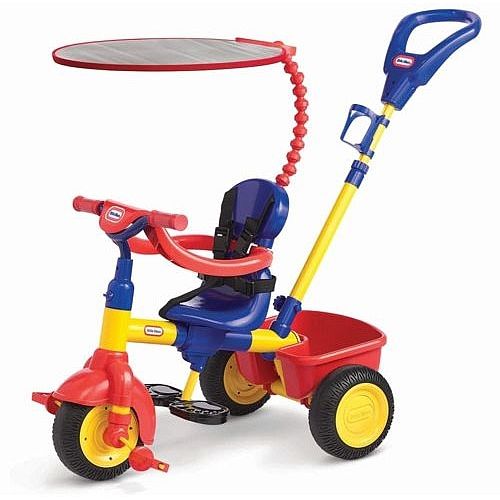
18) Bikes and ride-ons.  There are many different types.  Many now have a parent control bar for even the youngest of new riders.  These one the toddler grows into them from not being able to control or peddle the bike to zipping around all on their own.
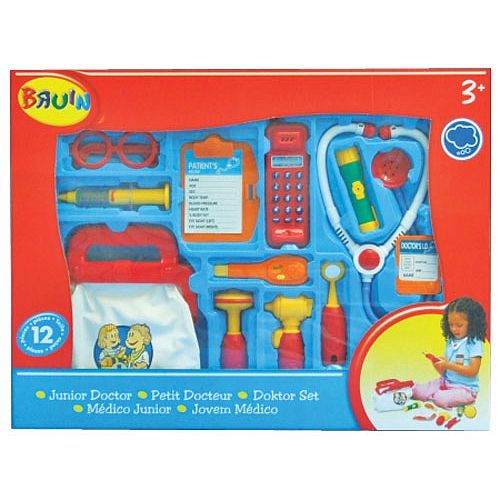
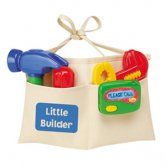
19) Adult looking play toys.  Tool belts, cash registers etc etc.  I can't stress enough how toddlers love pretending they are grown ups.  These types of toys will keep them busy for hours and smiling all day!

20) Don't be shy to ask the parents!  If you are still unsure what to get the special toddler in your life ask the parents what they think is an appropriate toy! No parent will ever be upset for asking for ideas and will be more then grateful that you are even thinking of their little one.

These are all great toddler gifts.  You do not have to get them what is in the pictures below.  These are only ideas of the list above.  I tried to keep the list vague so you could walk into any store and find something a toddler will love.  Pick out one you think you think is perfect and go to the store looking for something that fits that.  Keep it simple. Don't get overwhelmed! YOU CAN DO IT!! And have fun :)


1)


2)

3)

4)

5)

6)

7)
8)

9)
10)
11)
12)
13)
14)
15)
16)
17)

18)
19)
20)

November 25, 2011

20 Before Christmas Day Activities to do with the family


I decided to do a 20 list for Christmas activities to do with my family.

I will post it now and update it with pictures and links to the activities and details on how to's as I get them done.

20 Before Christmas Day Activities with the Family.

1) Bake yummy Christmas cookies/bars.

2) Make ornaments to put in the tree.

3)  Create a Christmas story together.

4)  Draw, Colour or paint a Christmas picture.

5) Read a beloved Christmas story together.

6) Watch a Christmas movie together.

7) Make a hand Christmas tree craft.

8) Write Santa a letter. There are many email options I prefer this one! :)

9)  Make/write Christmas cards together.

10) Make a Christmas countdown ( or advent) calendar together.

11) Make a Christmas Wreath together.

12)  Sing Christmas Songs together.

13) Visit santa at the mall.

14)  Go watch a Santa Claus parade.

15) Drive around looking at all the lights in the neighbourhood.

16) Make presents for pets.  (whippets)

17) Make presents for family.

18) Do a few Christmas pictures together.

19) Paint the snow outside.  ( If you have any.. if not paint the grass/ground )

20) Put up the Christmas tree and decorations!!!!


November 24, 2011

Willow's Story

Our little family wanted a little pup to call our own.  We had settled on a whippet and went looking for breeders.  We thought we had found one 45 mins away.  We were very excited on our drive up.  The "breeder" had called her a beautiful brindle with a heart of gold.  She was the last one to go and getting old at 4 months.
When we drove up to the farm I knew right away this wasn't good.  When we got out and she showed us where the pups were staying even my 8 year old pulled me aside to tell me that puppies shouldn't be kept like this.  Willow was in fact a sweet girl.  She ran around a bit outside then ran to our 8 year old ... flew into her lap.. and called her her own...
We had agreed prior to getting there that we would take a look at her, go home and think about it then return if we decided she was the whippet for us.  We couldn't leave her.. Our hearts broke at the thought of her having to stay there one more night.  The fact she had already endured 4 months was more then I could take.  We could tell she wasn't eating enough.  I had to get her out of there.  I never would usually buy from a puppy mill.. but when you are there and you have them in your arms.... you melt.. If I could have I think I would have taken all the pups.. We left with her and I held her tight the whole ride home.  I didn't have anything for her yet.  She wasn't suppose to be coming home with us that day...
Her Puppy Mill hit the news a few months later.  I was overjoyed to hear it was closed down.

We thought we had done our research.  We had found only one complaint online of someone stating it was run poorly but the mill had won back then and the people who had accused them of not taking care of their dogs ended up having to owe the "breeders" money!  I figured it was one person who wasn't happy with their dogs and were making a fuss... how wrong I was.  The web was full of people saying how happy they were with this "breeder" and their dogs.

I am beyond happy we have our Willow in our lives.  She is a drama queen and a princess.. she is high maintenance and extremely aloof even for a whippet, but I love her dearly. We have had a few health problems with her but that is to be expected... We loved her so much, that when we found out her brother needed our help... we took him in also...... but that I will leave for another time..


How could you not fall in love with this beautiful face.

Nap time for Whippets

Nothing a whippet loves more then napping with their little girl..


Life doesn't get better then this.  We "should" be doing some chores but napping often brings more joy.. 

Nap away my whipperoonies.. nap away... 

November 23, 2011

Chalkboard stairs - a work in progress


I love doing whimsical creative projects around the home.

What is more fun then chalkboards?!?
I decided my stairs needed some sprucing up and some magic!

Making chalkboard paint is EASY PEASY! All you need is:

1)  2tbsp non-sanded grout ( you can get this at almost any hardware supply store)

2)  1 cup of paint. Craft paint or even wall acrylic paint.

3)  Mix well and then PAINT! THAT SIMPLE! Do make sure to condition the chalkboard by using the side of a chalk and rubbing it all over after the paint is VERY dry. Wipe it down and you are ready to go!

I decided to go with black to REALLY give it a chalkboard look but you can make it in any colour your little creative imagination can dream up.


This was my "attempt" I thought it turned out well enough.


So I went on to do more steps a few days later. I found out that I need to use up the paint I make and not save it. It seems to bubble more easily if you save any paint.


I still have the rest of the steps to finish up and I will be doing the right side of the wall in chalkboard paint !! Will update once that is done.

Having fun with the chalkboard stairs...


First day of snow means turning on the oven!!


We had our first snow today!!! Oh the lovely white goop I shovelled for almost an hour before I had to go a parent teacher interview today.. joy!!!!

Once done with all of that and back in the warmth of the house, baking was a MUST!

We decided to try out a new recipe. I have many well loved Recipe's but we love baking out of my "Good Housekeeping Favorite Recipes Cookies!"

On the menu this snowy day was Peanut Butter Rocky-Road (smores) Bars!! Delish! it is like eating a peanut butter cookie by a campfire! The marshmallow and chocolate give it a smores appeal. I am REALLY missing summer today so this was the pick me up I need.

My 8 year old loves baking with me.. can you tell?


These are a simple bar for those peanut butter cookie lovers!

PEANUT BUTTER ROCKY-ROAD BARS

3/4 cup packed light brown sugar
2/3 cup creamy peanut butter
1/2 cup granulated sugar
4 tablespoon margarine or butter (1/2 stick), softened
1 1/4 cup all-purpose flour
1 teaspoon baking powder
1 teaspoon vanilla extract
2 large eggs
1 cup mini marshmallows
1/2 cup salted cocktail peanuts, chopped ( optional .. we didn't add these)
1/2 cup semisweet chocolate chops.

1. Preheat oven to 350F. Line a 13" x 9" baking pan with foil. Grease the foil.
2. At a low speed beat brown sugar, peanut butter, granulated sugar and margarine in your mixer until blended. speed it up to high till nice and creamy.
3. Lower your speed and add in slowly your flour, baking powder, vanilla and eggs until well blended... don't forget to keep scraping your sides often with a rubber spatula!! Grab your dough out of the mixer with your hands and evenly press the dough onto the bottom of the prepared baking pan.
4. Bake for 20 mins. Take it out and add sprinkle the marshmallows and chips ( and peanuts if you are adding them ) on top. Put it back in the oven and bake for an extra 5 mins.
5. Once it is cool lift it out with the foil and place it foil and all on a cutting board. Cut 4 strips lengthwise then cut each strip into 6 pieces. If your knife keeps getting stuck with the sticky marshmallow keep wetting your knife with water.


Next.. ENJOY! - I have had 3 of these bad boys today.. oh thighs have merci on me!!!